[C++ openCV] Image 이진화
먼저 이진화에 대해 알아보자.
이진화란?
영상처리에서 이진화는 어떤 주어진 임계값(threshold)보다 밝은 픽셀들은 모두 흰색으로, 그렇지 않은 픽셀들은 모두 검은색으로 바꾸는 것을 지칭한다[출처: google].
컬러의 이미지 에서는 각 픽셀이 B(Blue), G(Green), R(Red)의 값이 0 ~ 255로 이루어져 있다. 흑백의 경우는 밝기만을 나타내며 0은 가장 어두운 값이며, 255는 가장 밝은 흰색의 값이다. 우리는 threshold를 지정해 줄 것이며, 그 값보다 큰 경우 모두 255로, 작은 경우 모두 0으로 바꿔주려 한다.
C++ openCV환경에서 이진화
C++ openCV 환경에서의 이진화는 내장함수를 사용하면 아주 간단하게 할 수 있다. 하지만 직접 픽셀을 건드려서 구현해보려고 한다.ㅎㅎ
우선 아무 사진을 한장 다운 받는다.
사진을 다운받았다면 코드에서 다음과 같이 경로 및 컬러, 흑백 이미지를 정의해 준다.
#define IMAGE_PATH "opencv_test_image.jpg"
#define COLOR_IMAGE_WINDOW_NAME "color image"
#define GRAY_IMAGE_WINDOW_NAME "gray image"
단, 코드를 저장한 파일의 위치와 사진의 위치가 같은 경우 위와같이 경로를 저장하고, 아닌 경우에는 풀경로를 적어준다.
그리고 편의를 위해 using namespace를 사용한다.
using namespace cv;
using namespace std;
이렇게 하면 cv:: 나 std::를 붙여줄 필요가 없게 된다. 나는 귀찮지 아니하지만, 귀찮아 하는 사람들이 많아서 만들어진 것 같으니 사용해주도록 한다.^^
다음은 메인 함수에서 openCV Mat을 사용해 준다.
Mat imageColor;
Mat imageGray;
Mat img_binary;
이제 이미지를 불러와 보자
imageColor = imread(IMAGE_PATH, IMREAD_COLOR); //컬러 이미지
imageGray = imread(IMAGE_PATH, IMREAD_GRAYSCALE); //흑백 이미지
img_binary = imread(IMAGE_PATH, 0); //이진화한 사진 저장할 이미지
위의 두 내용을 합쳐서 다음과 같이 나타내어도 된다.ㅎ
Mat imageColor = imread(IMAGE_PATH, IMREAD_COLOR);
Mat imageGray = imread(IMAGE_PATH, IMREAD_GRAYSCALE);
Mat img_binary = imread(IMAGE_PATH, 0);
이미지를 정상적으로 가져오는지 확인하기위한 if문을 추가해 준다.
if (imageColor.empty() || imageGray.empty()) {
	cout << IMAGE_PATH
        << " 이미지를 불러오는 데 문제가 생겼습니다." << endl;
    return -1;
}
임계값(threshold)를 지정한다. 일단 100으로 지정해보자.
double threshold = 100;
for문으로 각각의 픽셀이 threshold보다 큰지 작은지 비교하여 0과 255로 바꿔준다.
for (int row = 0; row < imageGray.rows; row++){
    for (int col = 0; col < imageGray.cols; col++){

        if (imageGray.at<uchar>(row, col) > threshold){
            img_binary.at<uchar>(row, col) = 0;
        }
        else{
            img_binary.at<uchar>(row, col) = 255;
        }
    }
	cout << "\n" << endl;
}
이제 이미지를 생성해 보자
namedWindow(COLOR_IMAGE_WINDOW_NAME, WINDOW_NORMAL);
namedWindow(COLOR_IMAGE_WINDOW_NAME, WINDOW_AUTOSIZE);
imshow(COLOR_IMAGE_WINDOW_NAME, imageColor);
imshow(GRAY_IMAGE_WINDOW_NAME, imageGray);
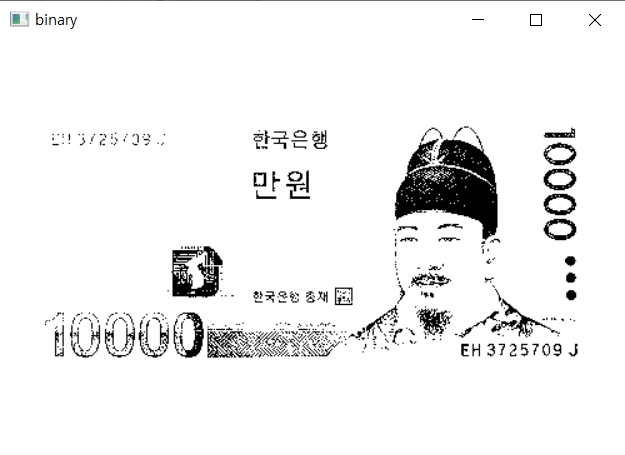
imshow("binary", img_binary);
위와같이 입력하면 컬러이미지, 흑백이미지, 이진화한 이미지가 모두 뜨는 것을 확인할 수 있다.
키 입력을 하면 사진이 사라질 수 있게 다음과 같이 넣어준다.
waitKey(0);
destroyWindow(COLOR_IMAGE_WINDOW_NAME);
destroyWindow(GRAY_IMAGE_WINDOW_NAME);
//한번에 지우기
//destroyAllWindows();
Code
#include "iostream"
#include "opencv2/opencv.hpp"
#include "opencv2/highgui/highgui.hpp"
#include "opencv2/core/types_c.h"

#define IMAGE_PATH "opencv_test_image.jpg"
#define COLOR_IMAGE_WINDOW_NAME "color image"
#define GRAY_IMAGE_WINDOW_NAME "gray image"

using namespace cv;
using namespace std;

int main() {
    Mat imageColor = imread(IMAGE_PATH, IMREAD_COLOR);
    Mat imageGray = imread(IMAGE_PATH, IMREAD_GRAYSCALE);
    Mat img_binary = imread(IMAGE_PATH, 0);

	if (imageColor.empty() || imageGray.empty()) {
		cout << IMAGE_PATH
			<< " 이미지를 불러오는 데 문제가 생겼습니다." << endl;
		return -1;
	}

	double threshold = 100;

	for (int row = 0; row < imageGray.rows; row++){
		for (int col = 0; col < imageGray.cols; col++){
			if (imageGray.at<uchar>(row, col) > threshold){
				img_binary.at<uchar>(row, col) = 255;
			}
			else{
				img_binary.at<uchar>(row, col) = 0;
			}
		}
		cout << "\n" << endl;
	}

	namedWindow(COLOR_IMAGE_WINDOW_NAME, WINDOW_NORMAL);
	namedWindow(COLOR_IMAGE_WINDOW_NAME, WINDOW_AUTOSIZE);
	imshow(COLOR_IMAGE_WINDOW_NAME, imageColor);
	imshow(GRAY_IMAGE_WINDOW_NAME, imageGray);
	imshow("binary", img_binary);

	waitKey(0);
	destroyWindow(COLOR_IMAGE_WINDOW_NAME);
	destroyWindow(GRAY_IMAGE_WINDOW_NAME);

	return 0;

}
Result
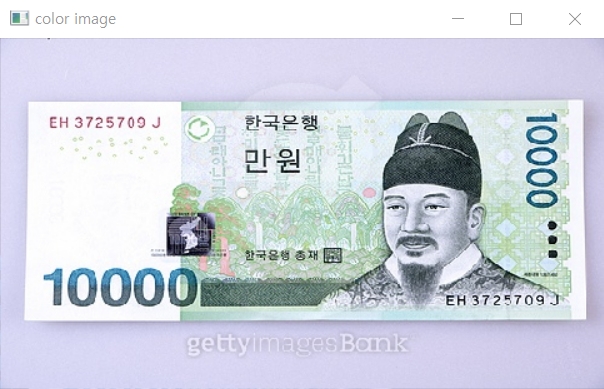
필자의 경우 구글링하여 얻은 만원짜리 이미지를 사용하여 이진화 하였다.ㅎㅎ 결과는 다음과 같다.
Color_image(origin)
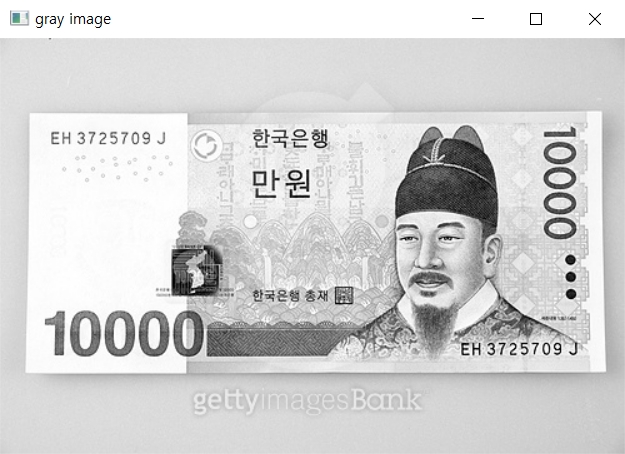
Gray_image
Binary_image